I almost panicked, looking through the window that fateful night. The rear brake lights on my daily driver were steadily on, and I was sure someone had broken in and was about to drive away. Or, what else could make the brake lights stay on in such a bold manner?
It didn’t help that the vehicle was heavily tinted. I tried very hard to look from my two-story apartment building. All was in vain.
Gathering all the manhood in me, I changed into a pair of shorts, grabbed the vehicle key and a flashlight, opened the front door, and got onto the stairs.
In less than 10 seconds, I was downstairs—and in the open. First, I ensured that the gate was securely locked and alerted the security guard at his post, just in case. Then, cautiously, I proceeded to the vehicle and looked through the windshield.
The driver’s seat was empty. I looked at the passenger’s seat. Nothing. Nobody. I went close and flashed my light into the car and onto the rear…NOTHING.
NOBODY.
I heaved a sigh of relief and rushed back to the rear of the vehicle to see if it was still illuminated. It was, and in a very bright fashion!
What on earth was happening?
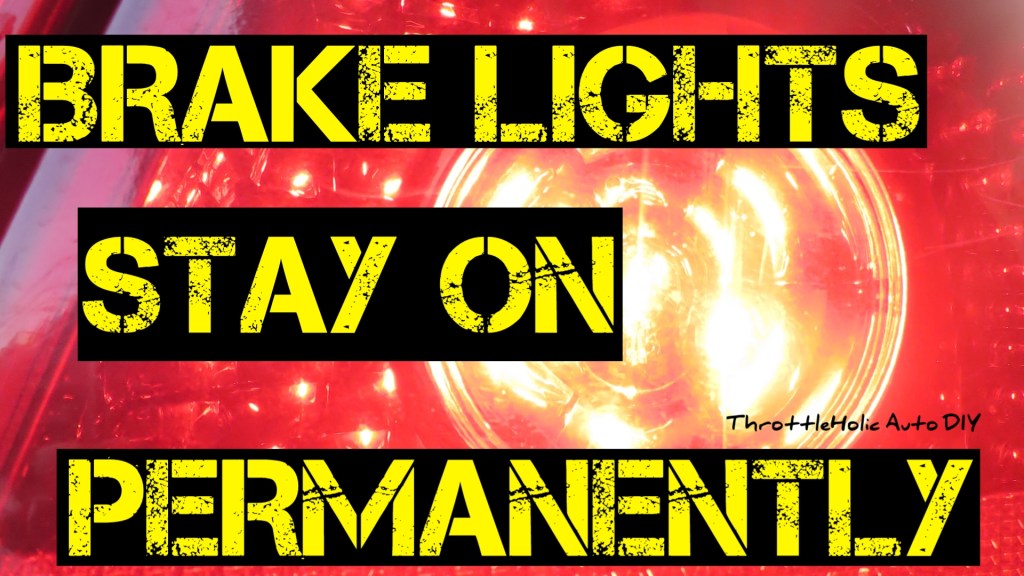
If your brake lights stay on permanently while driving (or parked), and my story above sounds familiar (and similar to your own experience), this article is for you. I’ll show you what could be wrong with your car, how to diagnose the same (and isolate), and importantly, how to fix the challenge yourself, in DIY fashion.
But first, a short story on brake lights.
Important Disclaimer
While every effort has been made to ensure the accuracy of the information published below, vehicle DIY carries a potential risk of damage to your car and/or personal injury. Please, defer to a competent mechanic if you’re unsure if you should proceed. I won’t be held liable for anything that goes wrong as a result of following the counsel contained therein. Treat this article as informational only (and proceed at your own risk).
Article Outline

Brief History of the Rear Brake Lights
The twin rear brake light system on an automobile is a very important safety feature: it indicates to drivers behind you that you’re slowing down and, potentially, stopping. This also helps them slow down their vehicles on time, safely, to avoid ramming into your car.
So important are these brake lights that in 1985, the US government mandated all vehicles built from the following year to carry a third, higher-mounted brake light, besides the customary rear two.
The thinking was that this third, higher-mounted brake light would attract the attention of other motorists better than the lower two, because of its vantage point.
Not done, all the states in the US (to my knowledge) penalize driving without functional brake lights.
This alone should tell you something: brake lights are no joke, and the business of notifying folks who are driving behind you of your intention of slowing down is sacred and non-negotiable.
Aware of all these, what do you do when after a drive, you park your vehicle on the driveway and as you make progress to your apartment/room, you notice that all three rear brake lights have refused to go off and as a matter of fact, are shinning as brightly as if your foot is still firmly depressed on the foot brake?
The first thought will be that SOMEONE, somehow, is in the vehicle and maybe wants to move it away, once you clear off; he/she is warming up to driving away (as was my feeling, when this first happened to me).
As you curiously (and cautiously check), no one is left in the vehicle, and the driver’s seat is very vacant, even from a few feet away.
The second thought flows in (after you heave a sigh of relief): there’s SOMETHING physically depressing the foot brake pedal that you must have missed while driving.
Gingered up and renewed with hope, you proceed to open the vehicle and inspect it.
NOTHING.
You check back to see if the brake lights are still on…of course, they are…and they are now shining brighter than the moon, with the fast approaching dusk.
You whip out the shiny OBD II scanner you recently ordered from Amazon and plug it into the OBD II port…for the first time, you’re disappointed with otherwise positive feedback: ‘this vehicle has no fault codes’.
You check pending codes; same story.
Officially, an otherwise great day has begun scheming on how to be bad already…
Brake Lights Stay On: What Causes This Challenge?
There are some pretty nasty (and not-so-nasty reasons) why your brake lights won’t go off, even with your foot off the brake pedal and the ignition switched to the ‘off’ position.
Here are the likely causes, starting with the MOST LIKELY.
1. Bad Brake Switch/a Brake Switch Not Properly Mounted or Adjusted
The brake switch on most vehicle models is mounted along the brake pedal, in such a manner that when the brake is depressed, the switch is activated, and conversely, when the brakes are released, the switch is deactivated.
Essentially, what this makes certain of is that the brake lights come on when the brake pedal is depressed, and the same lights extinguish once the pressure on the brake pedal is released.
As explained simply above, this created the ‘on-off’ effect you see when a vehicle with brake lights is used (on the road).
How to Fix a Bad Brake Switch On a Car
A brake switch has two ends: the ‘switch’ end and the socket end. Before you do anything, depress the switch part in and out, and while at it, get an assistant to watch out behind. If the lights come on and off, then you only need an adjustment to get things working again.
Look around the switch for a bolt signaling where it’s torqued. Using this bolt and an appropriate wrench, adjust it till it works as it should. In most cases, this is all that needs to be done.
However, if depressing this switch manually doesn’t get the brake lights to power on and off, it’s bad, and it’s time for a change. Look for the socket, unclip it, and wrench the unit out. This is usually a simple job that takes less than two minutes. The real challenge is how to get light down along the brake pedal and work there, hanging like a bat.
Replace the brake switch with what you take out and adjust till depressing the pedal, even ever slightly, powers on the brake lights (and conversely, seeing the brake lights go off immediately your foot leaves the brake pedal).

2. Wrong, Bad, or Compromised Bulbs Used
Using the wrong bulb types on the brake lights can cause them to permanently stay on, flicker, or behave in an inconsistent manner, even if the brake switch is functioning properly and torqued correctly.
The same thing applies to compromised bulbs or bulbs that have gone bad and need to be replaced.
A great pointer that you have compromised bulbs (or are using the wrong bulb type) is if the challenge of the bulbs refusing to go off only happens on one side, happens when you decide to ‘upgrade’ your brake lights, or happens when you have two bulb setups in your rear.
How to Sort a Bulb Challenge on a Car
When faced with a situation where your brake lights stay on (and you suspect the bulbs as explained above), checking on the actual bulbs to make certain that they’re in great working condition should be one of the items you need to check before bothering with other, more complex checks or fixes.
While at the bulbs, remove them one by one and make sure that they are all rated in a manner consistent with the owner’s/repair manual. Not only that, ensure that you’re running the OEM recommendation and not some funny, funky ‘upgrades’.
I’ve been privileged to resolve many brake (and headlight) related matters by simply changing the bulbs to the recommended OEM specs and making sure that the replacements are new and functional.
You should take a close and interested look at this route too, if the brake switch isn’t to blame.
3. Naked Wiring
Compromised wiring to the rear brake lights can also cause a lot of challenges for the brake lights themselves to warrant them staying brightly on when they have no business remaining illuminated.
Usually, such a compromise happens when the covering of the wires is compromised and the naked wires touch themselves (or any other metal part of the vehicle).
The first sign of such a challenge is usually the flickering of the brake and rear lights, generally (when in use or not).
This doesn’t happen all the time, however: sometimes, the brake lights (and other lights) come on and simply refuse to go off, no matter what you do.
How to Sort a Naked Wiring Challenge on a Car
The first thing you’ll notice with your brake lights when there’s a naked wire challenge is that the lights will flicker. This flickering is the telltale giveaway, even if it stays on for some time (before, during, or after the flicker).
If this is your car, check up on the wiring, especially if any of it happens to be externally exposed.
If you find such wires exposed, PVC tape will do a great job of masking the exposed parts, and the issue will be sorted as simply as that.
Note also that in some cases, water ingress can also cause the lights to flicker in an erratic manner. If you have any challenge with water ingress into the vehicle, it’s best to seal the entry point up, and then make sure everywhere is dried up before changing bulbs (or any other thing that may have been water-compromised).
4. Worn Brake Pedal Spring
Most vehicle parts, at least on well-engineered modern vehicles, are designed to last the lifetime of the car.
This, unfortunately, is subject to debate. While the manufacturers usually look at this period as anything from 300k to 500k miles, there are cars, everyday, that cover much more than that (even if the engines/trannies aren’t original).
This leaves many parts that should not have otherwise failed to fail. When this failure happens, you’re left with something to fix, as the car owner.
The brake pedal spring, unfortunately, is one such part.
How to Sort a Worn Brake Spring on a Car
Sorting a worn brake spring on a car’s brake pedal is simple: use a screwdriver (or wrench) and pry out the worn-out brake spring and replace it with another of the same strength and rating.
Getting the new one in place is also equally simple: simply hang it on one end and, using a screwdriver or wrench, draw it up to the other end where it hangs to give the springing and returning effect.
NOTE:
While taking out and putting back springs, be sure to wear glasses or at least keep your eyes out of the spring’s travel path. Missed, springs easily bounce back, and since your eyes are usually in their travel path, they will likely hit them (and cause damage).
Take special note of this.
5. A Stuck Brake Pedal
Have you heard about Toyota’s unintended acceleration issue? If you have, great. If you haven’t, allow me to explain in less than a sentence: it was a challenge with Toyota vehicles where the accelerator would stick to the floor of the vehicle, causing the vehicle to accelerate, without intent.
This caused many (unintended) crashes for the affected vehicles. And, as you can imagine, trauma for their owners/drivers.
A stuck brake pedal does something similar: it gets down (by some degree) and refuses to come up. There are a million and one reasons why this might be so, but the most recurring, almost all the time, is some physical weight on the pedal (assuming the brake pedal spring, treated above, ticks out fine).
How to Sort a Worn Brake Spring on a Car
This is the simplest challenge to treat: get down to the vehicle’s brake pedal and see what’s in its way.
Usually, a misaligned foot mat is the culprit, especially if you’re using aftermarket types. If you love leaving trash in your car, this can also greatly contribute to this challenge.
Clearing the area of the brake pedal should take you less than a minute, max.
6. A Blown Fuse
If you’ve done all I’ve suggested (and treated above) and the brake lights still stay and remain on, it would be a smart decision to check the fuse box for a blown fuse.
Since a fuse is the weakest link in an electrical cycle (in your car), it makes sense to wrap up your diagnosis with it.
How to Sort a Blown Brake Fuse on a Car
Usually, on most models, there are two fuse boxes: one by the driver’s side foot well and another in the engine bay.
With the help of your owner’s manual, locate the correct fuse box and check for the fuse controlling the rear/brake lights.
Once you find it, make sure that it is changed to a similarly rated fuse and replaced snugly, without any clearance.

What You Should Do If Your Brake Lights Do Not Turn Off
More than 90% of the time, in my experience, when the brake lights stay on, the challenge is usually with a bad brake switch or a brake switch that isn’t properly adjusted.
Manually depressing the tip of the brake switch while still attached to the brake pedal is a great way of checking if it’s still in good working condition.
If it is, what needs to be done is a simple adjustment to make certain that the brake lights go off, coming on only when depressed and needed (only).
However, if depressing and releasing the ends of the brake switch doesn’t cause the brake lights to power on and off, it has certainly failed (and requires a replacement).
In that case, all you need to do is order a replacement, unscrew the old one, and torque on the new one, and the problem is solved!
If you’re interested in watching the video process of the procedure or generally prefer visuals, the video I shot some time back and shared below remains instructive.
If, for some reason, your rear brake lights remain on after all your diagnosis, it’s best to consult a qualified mechanic at this point. Don’t mess around playing with things, as you can potentially cause more damage.
Wrap-Up: Is It Okay to Drive with Brake Lights On?
Without mincing words or beating about the bush, NO – you should get your brake lights fixed as soon as possible when they refuse to go off.
The reason is simple: other vehicle owners rely on the brake lights of your car to make critical driving decisions such as braking, overtaking, and increasing speed.
With the brake lights permanently on, this all-important safety measure is negated, with the drivers behind you left without a clue when you depress the brakes, and accidents are likely to result as a consequence, especially rear-endings.
Luckily, this is a very DIY-friendly task, and all the likely causes take only a few minutes to an hour, max, to isolate and fix, depending on the year and model of your vehicle (as the article above has shown).
Love the Above? Subscribe for More
Throttle Lan
DIY Mechanic and Freelance Auto Writer